Okta SAML
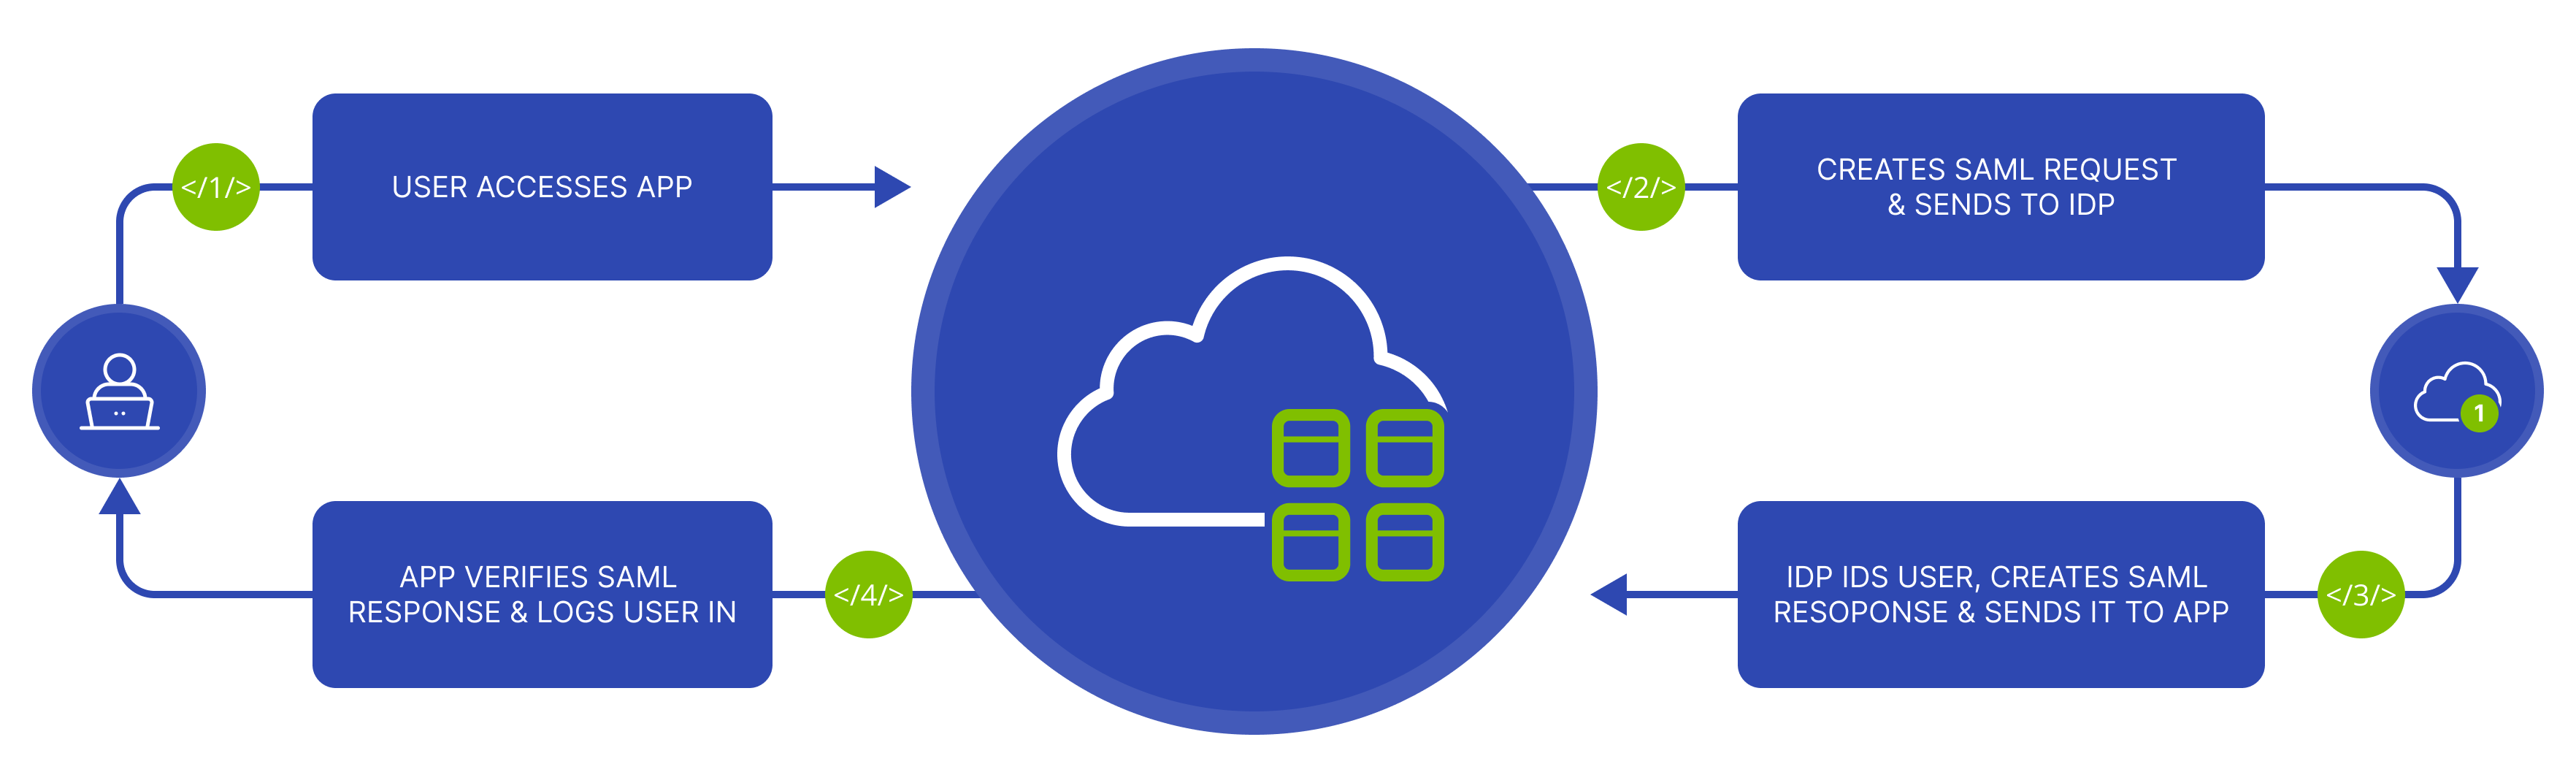
Route4Me’s SAML SSO Integration enables you to log into Service Provider websites, such as Route4Me, with your existing user identity from your own website or app, such as Okta. Creating an app integration between Route4Me and Okta is a straightforward process. In this guide, you can learn how to create an Okta SAML integration with Route4Me, choose your preferred settings, add an optional app logo, and more. Additionally, you can learn how to set your preferred SSO (Single Sign-On) settings and share SAML Metadata details.
General Okta SAML Settings to Create SAML Integration
To create a Route4Me integration, sign in to your Okta developer account as a user with administrative privileges and follow the steps below to fill in the necessary information and adjust the following preferred settings:
- In the Admin Console, go to “Applications” and then “Applications“.
- Click “Create App Integration“.
- Select “SAML 2.0″ in the “Sign-in method” section and click “Next“.
- In the “General Settings” tab, enter the name for your integration, optionally upload a logo, and click “Next“.
Okta SAML Configuration
Once you have set the general integration settings, you can configure the SAML settings. In detail, the SSO URL, Service Provider Entity ID, Name ID Format, and more.
- In the “Single sign-on URL” field, enter the Assertion Consumer Service (ACS) URL: (e.g., https://sp.example.com/assertion-consume).
- In the “Audience URI (SP Entity ID)” field, enter the entity_id (e.g., https://sp.example.com.
- Click “Next” to proceed.
- Go to the “Assignments” tab.
- Click “Assign” and assign users or groups who should have access. Only these users can authenticate via SAML SSO.
- In the “Attribute Statements” section, enter the required SAML attributes:
- Name (in SAML application): Value (in Okta profile)
- Email: user.email
- First Name: user.firstName
- Last Name: user.lastName
- Note down the Identity Provider Single Sign-On URL, Issuer/Entity ID, and Certificate from your Okta application’s settings. These values are required for the general settings.
- Finally, click “Finish” and perform a test by logging in with a user assigned to the application.
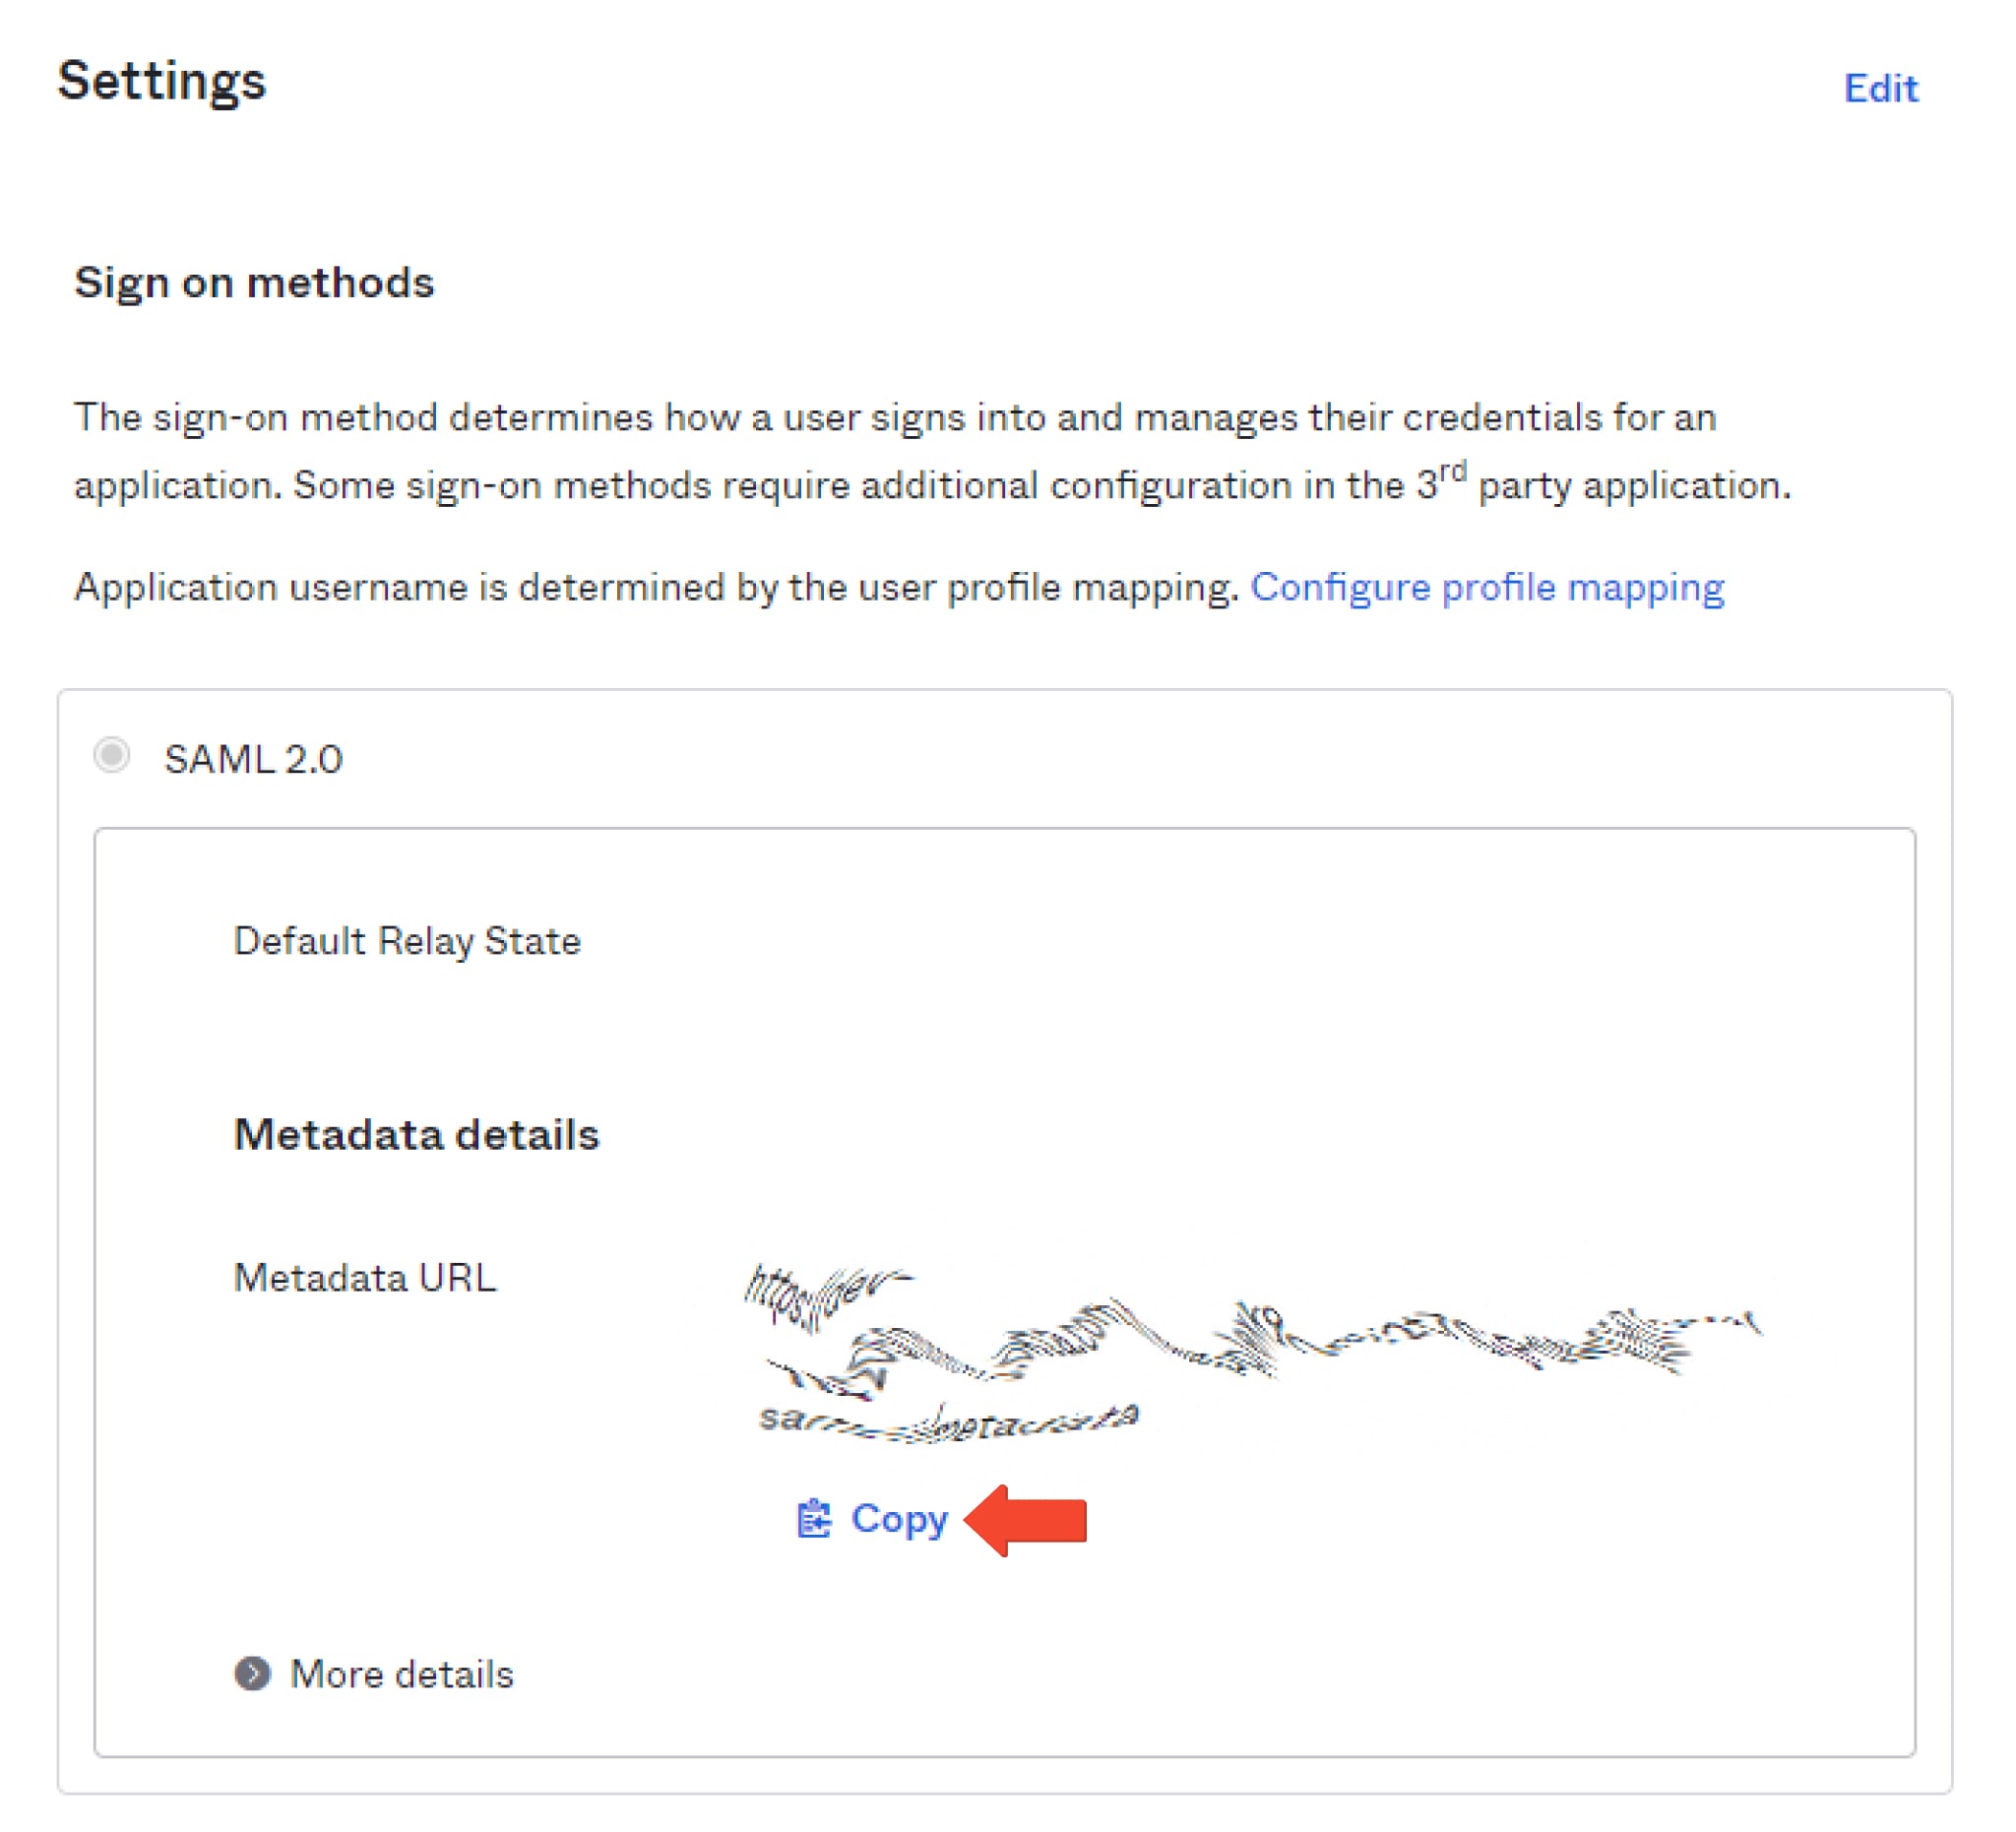
Sharing Okta SAML Metadata Details
Additionally, you can download the Identity Provider Metadata for your integration. This information is needed to configure the SAML connection settings in the Route4Me SAML application. To do so, go to the “Sign On” tab. In the “Sign on methods” section, locate the “Identity Provider metadata” link and click “Copy”.